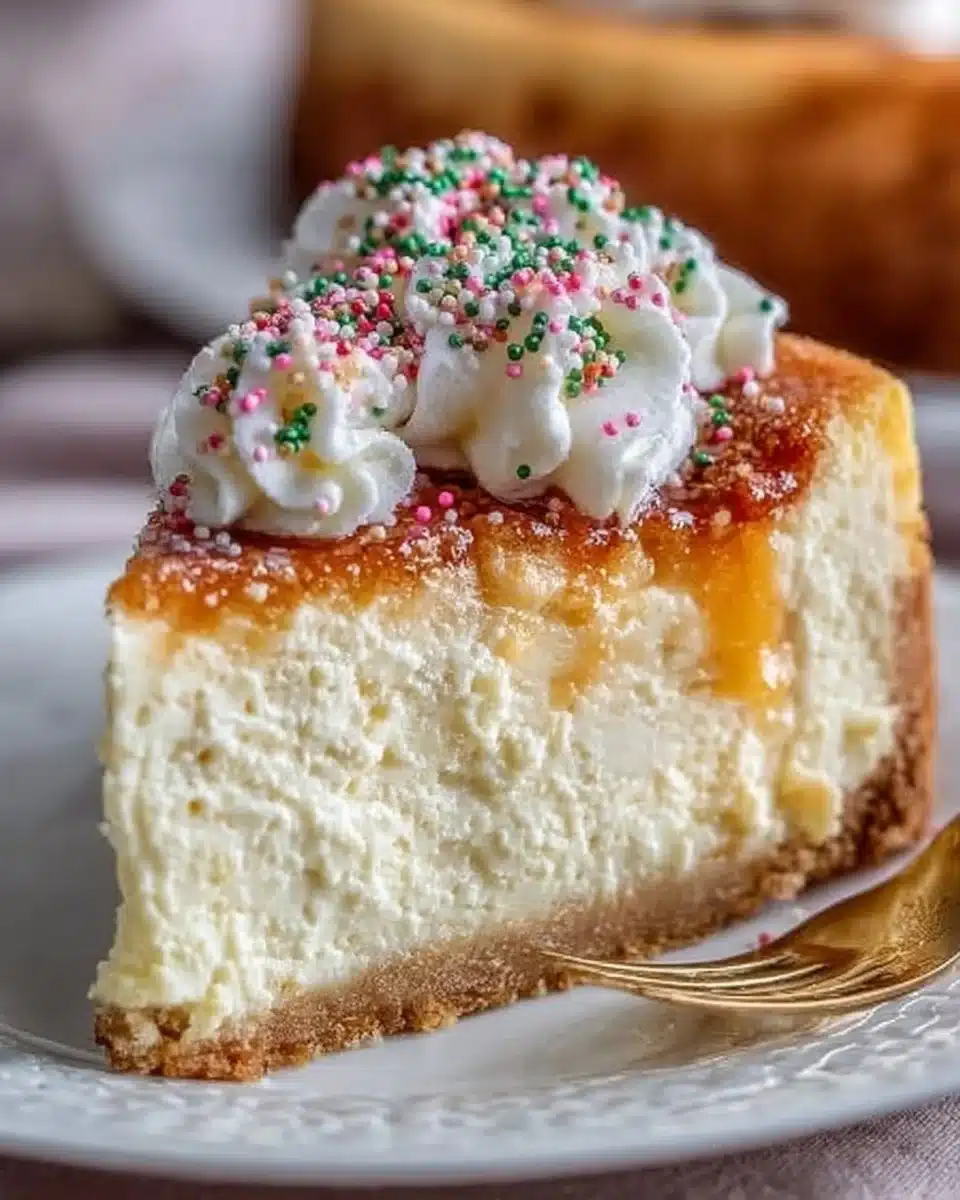
A warm oven hum fills the kitchen as the smell of browned butter and vanilla drifts through the air, promising something festive and comforting. This Dreamy Sugar Cookie Cheesecake: 5 Irresistible Layers feels like a holiday hug on a plate, with crisp sugar cookie notes meeting a silken, rich cheesecake center, all topped with fluffy cookie-style frosting and cheerful sprinkles. Serve it at a family gathering, a birthday, or whenever you want a showstopper that tastes like childhood memories made elegant, and if you need more cookie inspiration for the season, peek at this collection of festive Christmas cookies for complementary treats.
What Makes This Special
There is something magical about combining two beloved desserts, and this Dreamy Sugar Cookie Cheesecake: 5 Irresistible Layers does just that. The base starts with a soft sugar cookie layer that becomes lightly crisp at the edges, then a luxuriously smooth cheesecake fills the middle, followed by a thick, dreamy cookie frosting and a final shower of sprinkles. Each layer brings a different texture and flavor that plays together like a well-rehearsed duet.
The result is a dessert that feels celebratory and familiar at the same time. It looks showy on a buffet table, but the flavors are comfortingly straightforward, which makes it perfect for busy hosts who want big impact without fuss.
- Creamy and silky cheesecake center for a luxurious mouthfeel
- Tender sugar cookie crust for a sweet, buttery base
- Fluffy cookie frosting to echo the crust and add a festive finish
Gather These Ingredients
These ingredients combine to create distinct layers, so take a moment to read the notes before you start. Room temperature eggs and butter help create a smooth cookie dough and a lusciously whipped cheesecake. Use high quality vanilla and real sugar for the best flavor, and the sprinkles are optional, but they bring color and a playful crunch.
1 ¾ cup all-purpose flour
½ tsp baking soda
½ tsp salt
¾ cup unsalted butter, room temperature
1 cup Regenerative Organic Certified® Cane Sugar
1 tsp pure vanilla extract
1 large egg, room temperature
1 egg yolk, room temperature
⅓ cup Christmas sprinkles (jimmies)
1 ½ cups all-purpose flour
½ tsp salt
½ cup unsalted butter, room temperature
1 cup Regenerative Organic Certified® Cane Sugar
1 tsp pure vanilla extract
5 tbsp milk
(Note, the flour, butter, and sugar measurements reflect separate components of the cookie and frosting layers, so keep them organized as you prep.)
Step by Step
- Preheat the oven to 350°F, and generously grease a 9-inch springform pan. The warm, buttery aroma from the oven will start to build as you prepare the base.
- In a bowl, whisk the dry ingredients, flour and salt, until evenly combined, a light cloud of flour scent rising as you whisk.
- In a separate bowl, cream the softened unsalted butter and granulated sugar until light and fluffy, about 2 to 3 minutes, stopping to scrape down the sides so everything blends evenly.
- Reduce the mixer speed, add the egg yolk and vanilla extract, and mix until just incorporated, the mixture turning silky and glossy.
- Gradually add the dry ingredients to the wet, mixing on low until just combined, the dough coming together into a soft, slightly tacky ball. Press this dough evenly into the prepared springform pan, smoothing it with your fingers or the back of a spoon.
- Bake the crust for 12 to 15 minutes, until the edges are lightly golden and the center feels set, releasing a warm, baked sugar aroma. Cool completely on a wire rack so the crust firms up and holds the filling.
- Reduce the oven temperature to 325°F. Beat completely softened cream cheese on medium speed for 3 to 4 minutes until incredibly smooth and creamy, scraping the bowl so no lumps remain. Gradually add granulated sugar, beating until smooth and glossy.
- Stir in sour cream, heavy cream, vanilla extract, and a pinch of salt until just combined, then sprinkle 1 tablespoon of all-purpose flour over the mixture and gently fold it in. The texture should be velvety and dense, like a luscious pudding.
- One at a time, beat in the large eggs on the lowest speed possible until just incorporated, taking care not to whip excess air into the batter, which keeps the cheesecake crack-free and silky. Scrape down the bowl for a uniformly smooth filling.
- Wrap the outside of the springform pan with two layers of heavy-duty aluminum foil, then pour the cheesecake filling over the cooled sugar cookie crust. Place the foil-wrapped pan into a larger roasting pan to prepare a gentle water bath. Carefully pour hot water into the roasting pan until it comes about halfway up the sides of the springform pan, the steam creating an even bake.
- Bake for 60 to 75 minutes, until the edges are set and the center still jiggles slightly when you gently nudge the pan, the kitchen filling with a sweet, tangy cream cheese aroma. Turn off the oven, prop the door open, and let the cheesecake cool in the oven for 1 hour to prevent sudden temperature changes that cause cracking.
- Remove the pan from the oven and the water bath, then cool completely to room temperature on a wire rack, allowing the surface to settle into a smooth, satin finish. Cover loosely and refrigerate for at least 6 hours, ideally overnight, for a firm, sliceable texture.
- In a large mixing bowl, beat softened unsalted butter on medium speed for 2 to 3 minutes until light and fluffy. Gradually add sifted powdered sugar, ½ cup at a time, beating on low, then increase speed and beat for another 2 to 3 minutes until light and fluffy. Add salt, vanilla extract, and 2 tablespoons of milk, then beat until well combined. Adjust the frosting by adding more milk 1 tablespoon at a time if needed for a spreadable consistency, and consider mixing in a little color for a festive look.
- Once the cheesecake is thoroughly chilled and firm, run a thin knife around the edge of the springform pan before releasing the sides. Transfer the cheesecake to a serving platter, spread the prepared sugar cookie frosting evenly over the top with an offset spatula, and create decorative swirls if you like. Sprinkle the ⅓ cup Christmas sprinkles over the frosting for a cheerful finish.
- Return the decorated cheesecake to the refrigerator for at least 30 minutes to allow the frosting to set slightly. For clean slices, dip a sharp knife under hot water, wipe it dry, and slice in long, decisive strokes between each cut.
Prep ~45 minutes, Cook ~75 minutes plus crust bake, Total ~8 hours including chilling, Servings ~12, Kcal ~650 per serving (estimated)
While you are decorating, if you want ideas for turning these flavors into smaller treats, try pairing the frosting concept with cookie sandwiches and explore more party-friendly options at this birthday cookie inspiration page.
Plan Ahead
This cheesecake is very friendly to being made in stages, which makes it a wonderful dessert to prepare when your schedule is full. You can bake the sugar cookie crust a day or two in advance and keep it wrapped tightly at room temperature. The cheesecake filling can be mixed and baked the day before serving, as the flavors deepen overnight in the refrigerator.
If you plan to assemble earlier, make the frosting the morning you serve so it keeps a bright, fluffy texture. Assemble and decorate the cheesecake several hours before guests arrive, then chill until service. For travel, lock the cheesecake into a sturdy container and keep it chilled with ice packs until it reaches the party.
How to Store Leftovers
Store the cheesecake in the refrigerator, covered tightly with plastic wrap or inside an airtight cake keeper, for up to 4 days. The frosting may soften slightly over time, so serve slices chilled, which helps keep the layers defined. To freeze, wrap the whole chilled cheesecake tightly in two layers of plastic wrap and a layer of foil, then place it in a heavy duty freezer bag for up to 2 months. Thaw in the refrigerator overnight. If you freeze individual slices, wrap each piece separately for easier thawing.
When reheating, avoid putting the cheesecake in a hot oven, the texture will change. Instead, let slices sit at room temperature for 20 to 30 minutes before serving to soften slightly, or for a just-warm bite, set a slice on a small plate and microwave for 10 to 15 seconds, checking frequently. A freshness cue is the crust and frosting texture, they should feel firm and not overly syrupy or separated.
Perfect Pairings
- Fresh berry compote or macerated strawberries for bright acidity
- A dollop of lightly whipped cream and a few extra sprinkles for celebration
- Espresso or strong brewed coffee to cut the sweetness and complement the cream cheese
- Mint sprigs or candied citrus peel for a fragrant counterpoint
- A simple fruit salad with citrus to balance richness
Make It Your Own
- Use brown butter in the cookie crust for a deeper, nutty note, the edges will take on a caramelized aroma.
- Add lemon zest to the cheesecake filling for a bright lift, 1 teaspoon will provide a gentle citrus presence.
- Swap the Christmas sprinkles for chopped toasted nuts or crushed shortbread for a grown up finish.
- Fold in a tablespoon of finely chopped chocolate to the frosting for a subtle chocolate ripple.
- Make mini versions in a muffin tin for individual servings that are easier to transport and serve.
- Create a gluten free version by swapping the flour with a 1 to 1 gluten free blend and watching texture, the cheesecake will remain creamy.
- Add a thin ribbon of fruit jam between the crust and the cheesecake for a jewel like surprise when you slice.
All of these options maintain the spirit of Dreamy Sugar Cookie Cheesecake: 5 Irresistible Layers without introducing alcohol or meats, keeping the recipe versatile and family friendly.
Cook’s Notes and Secrets
- Bring all dairy and eggs to room temperature before mixing, this ensures the cheesecake batter incorporates smoothly and prevents lumps.
- Wrap the springform pan in heavy foil thoroughly to stop water from seeping into the cheesecake during the water bath.
- Do not overmix the eggs into the filling, minimal air prevents cracks and gives a dense, silky texture.
- Cool the cheesecake gradually, first in the oven with the door cracked, then at room temperature, then in the refrigerator for the best texture.
- For the cleanest slices, warm and wipe the knife between cuts, and slice in a single straight motion when possible.
- A toothpick inserted near the edge should come out clean when the edges are set, but the center will still wobble slightly, that wobble translates to a perfectly creamy center after chilling.
Your Questions, Answered
• How do I prevent cracks in my cheesecake?
Cracks form when the surface cools too quickly or when the batter has too much air. Use room temperature ingredients, beat eggs in slowly, avoid overmixing, and cool the cheesecake slowly with the oven door cracked to let it settle gently.
• Can I skip the water bath?
A water bath creates a humid oven that bakes the cheesecake evenly and reduces cracking. If you skip it, bake at a lower temperature and watch closely, but you may see more surface imperfections.
• Can I make this without the sugar cookie crust?
Yes, a classic graham cracker or digestive biscuit crust works well. Press it firmly and prebake for a few minutes so it holds up under the filling.
• Is it possible to make this dairy free?
You can experiment with dairy free cream cheese and butter substitutes, but texture and flavor will differ. Choose products specifically designed for baking and chill well before slicing for best results.
• How do I transport the cheesecake safely?
Chill the cheesecake thoroughly, place it on a flat, rigid surface inside a cake carrier, and keep it cool with chilled gel packs if you will be traveling for more than 30 minutes. Secure it so it cannot slide.
• Why did my frosting become runny?
Runny frosting often results from too much liquid or from the butter being too warm. Chill the bowl briefly and rewhip, adding powdered sugar a tablespoon at a time to thicken, or add a touch more cold butter.
Final Thoughts
Dreamy Sugar Cookie Cheesecake: 5 Irresistible Layers is a dessert that feels both festive and familiar, a comforting combination of buttery cookie and creamy cheesecake topped with fluffy frosting and joyful sprinkles. It rewards a little planning, and the staged prep makes it accessible for home bakers who want an impressive centerpiece. Give this recipe a try for your next celebration, and enjoy the way each slice carries the warmth of home with an elevated, memorable finish.
Print
Dreamy Sugar Cookie Cheesecake: 5 Irresistible Layers
- Total Time: 480 minutes
- Yield: 12 servings 1x
- Diet: Vegetarian
Description
A festive and comforting dessert combining layers of sugar cookie and cheesecake with a fluffy frosting and cheerful sprinkles.
Ingredients
- 1 ¾ cup all-purpose flour
- ½ tsp baking soda
- ½ tsp salt
- ¾ cup unsalted butter, room temperature
- 1 cup Regenerative Organic Certified® Cane Sugar
- 1 tsp pure vanilla extract
- 1 large egg, room temperature
- 1 egg yolk, room temperature
- ⅓ cup Christmas sprinkles (jimmies)
- 1 ½ cups all-purpose flour
- ½ tsp salt
- ½ cup unsalted butter, room temperature
- 1 cup Regenerative Organic Certified® Cane Sugar
- 1 tsp pure vanilla extract
- 5 tbsp milk
Instructions
- Preheat the oven to 350°F and grease a 9-inch springform pan.
- In a bowl, whisk the dry ingredients: flour and salt.
- Cream softened butter and sugar until light and fluffy.
- Add the egg yolk and vanilla extract, mixing until incorporated.
- Gradually add the dry ingredients, mixing on low until combined.
- Press dough into the prepared springform pan and bake for 12-15 minutes until golden.
- Cool the crust on a wire rack.
- Reduce the oven temperature to 325°F. Beat cream cheese on medium speed until smooth.
- Add sugar gradually, mixing until glossy.
- Stir in sour cream, heavy cream, vanilla extract, and salt until combined.
- Beat in eggs one at a time on low speed.
- Wrap the springform pan with aluminum foil and pour the cheesecake filling over the cooled crust.
- Place in a larger roasting pan and pour hot water halfway up the sides of the pan.
- Bake for 60-75 minutes until set with a jiggle in the center.
- Cool in the oven for 1 hour, then cool to room temperature and refrigerate for at least 6 hours.
- For the frosting, beat softened butter until fluffy, then gradually add powdered sugar.
- Mix in salt, vanilla extract, and milk until combined, adjusting milk as needed.
- Spread frosting over cooled cheesecake and top with sprinkles.
- Chill for at least 30 minutes before slicing.
Notes
Use high quality vanilla for the best flavor. Store leftovers in the refrigerator for up to 4 days.
- Prep Time: 45 minutes
- Cook Time: 75 minutes
- Category: Dessert
- Method: Baking
- Cuisine: American
Nutrition
- Serving Size: 1 slice
- Calories: 650
- Sugar: 40g
- Sodium: 300mg
- Fat: 45g
- Saturated Fat: 25g
- Unsaturated Fat: 18g
- Trans Fat: 0g
- Carbohydrates: 70g
- Fiber: 1g
- Protein: 8g
- Cholesterol: 120mg
Keywords: cheesecake, sugar cookie, dessert, festive dessert, holiday baking